
Connecting your bank account data is necessary to use re:cap. You can connect your accounts via manual upload or via open banking.
Connect via manual upload (e.g. savings accounts)
Certain banks might not support open banking API access. Additionally, especially EU banks, might not provide access to savings accounts. In those cases it is still possible to import the data into re:cap by following the steps below.
The steps may vary by bank, but generally follow this pattern:
1. Get the statement from your bank
1. Log into your online banking.
2. Locate the statement, normally found under a section called Accounts & documents, or at the bottom of your transaction page.
- Taking Qonto as an example, you find the button here:
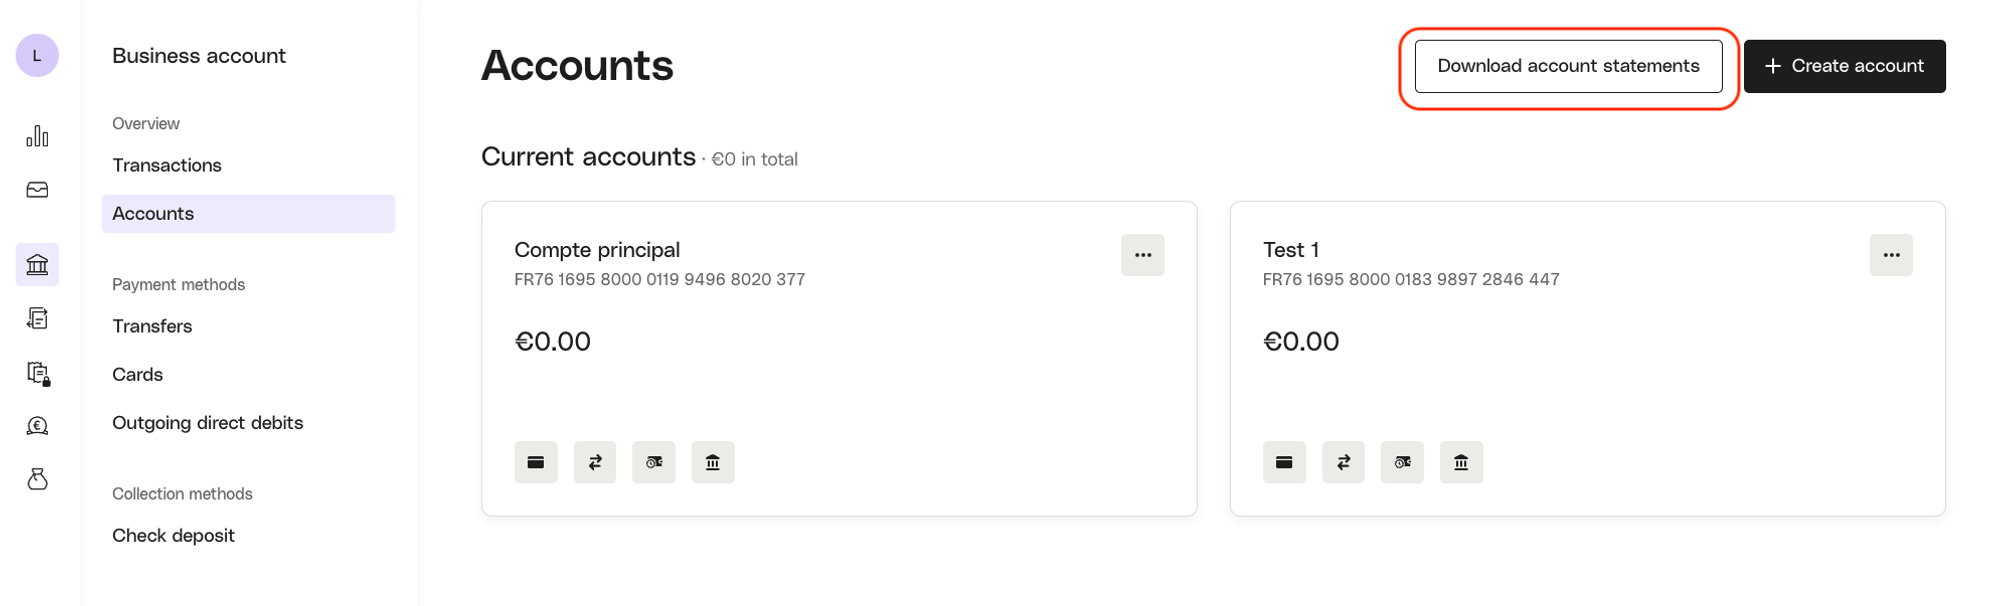
3. Download the statement of balances (in XLS/CSV format).
- The file needs to include all transactions up until the current balance.
- Select the longest possible date range when exporting.
These are the fields required:
- Valuation date (not only the booking date)
- Account holder
- Account IBAN
- Purpose
- Amount
- Currency
- Status
- Counter holder
- Counter IBAN
The file should look something like this:

2. Uploading your XLS/CSV file
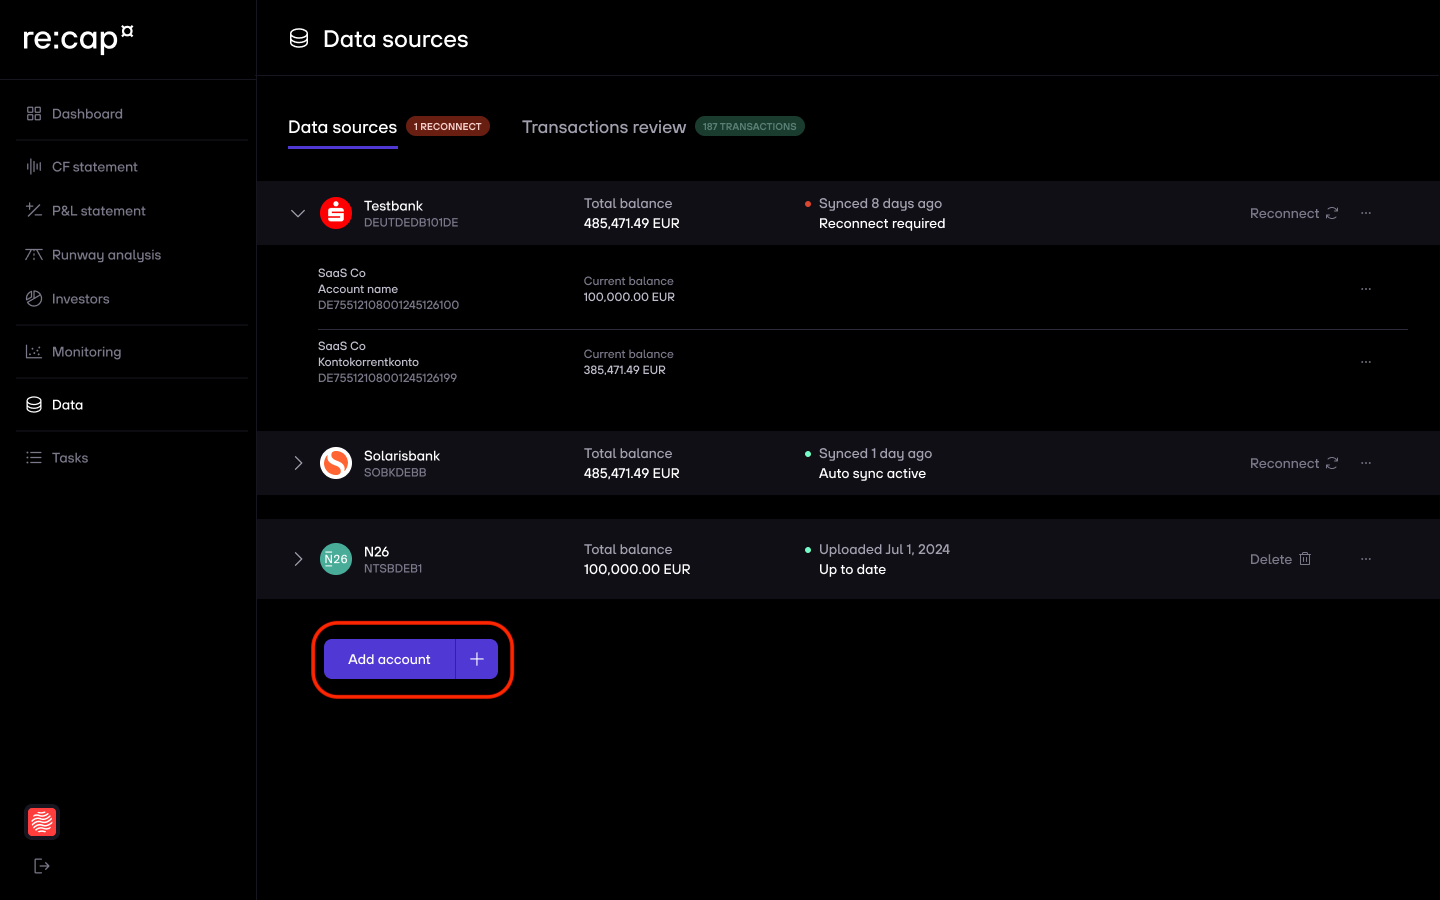
1. Click on Data in the navigation menu and then on Add bank account at the bottom of the screen.
- If you are not sure your XLS/CSV file is correctly prepared, feel free to check out our template of a bank statement with the relevant rows below:
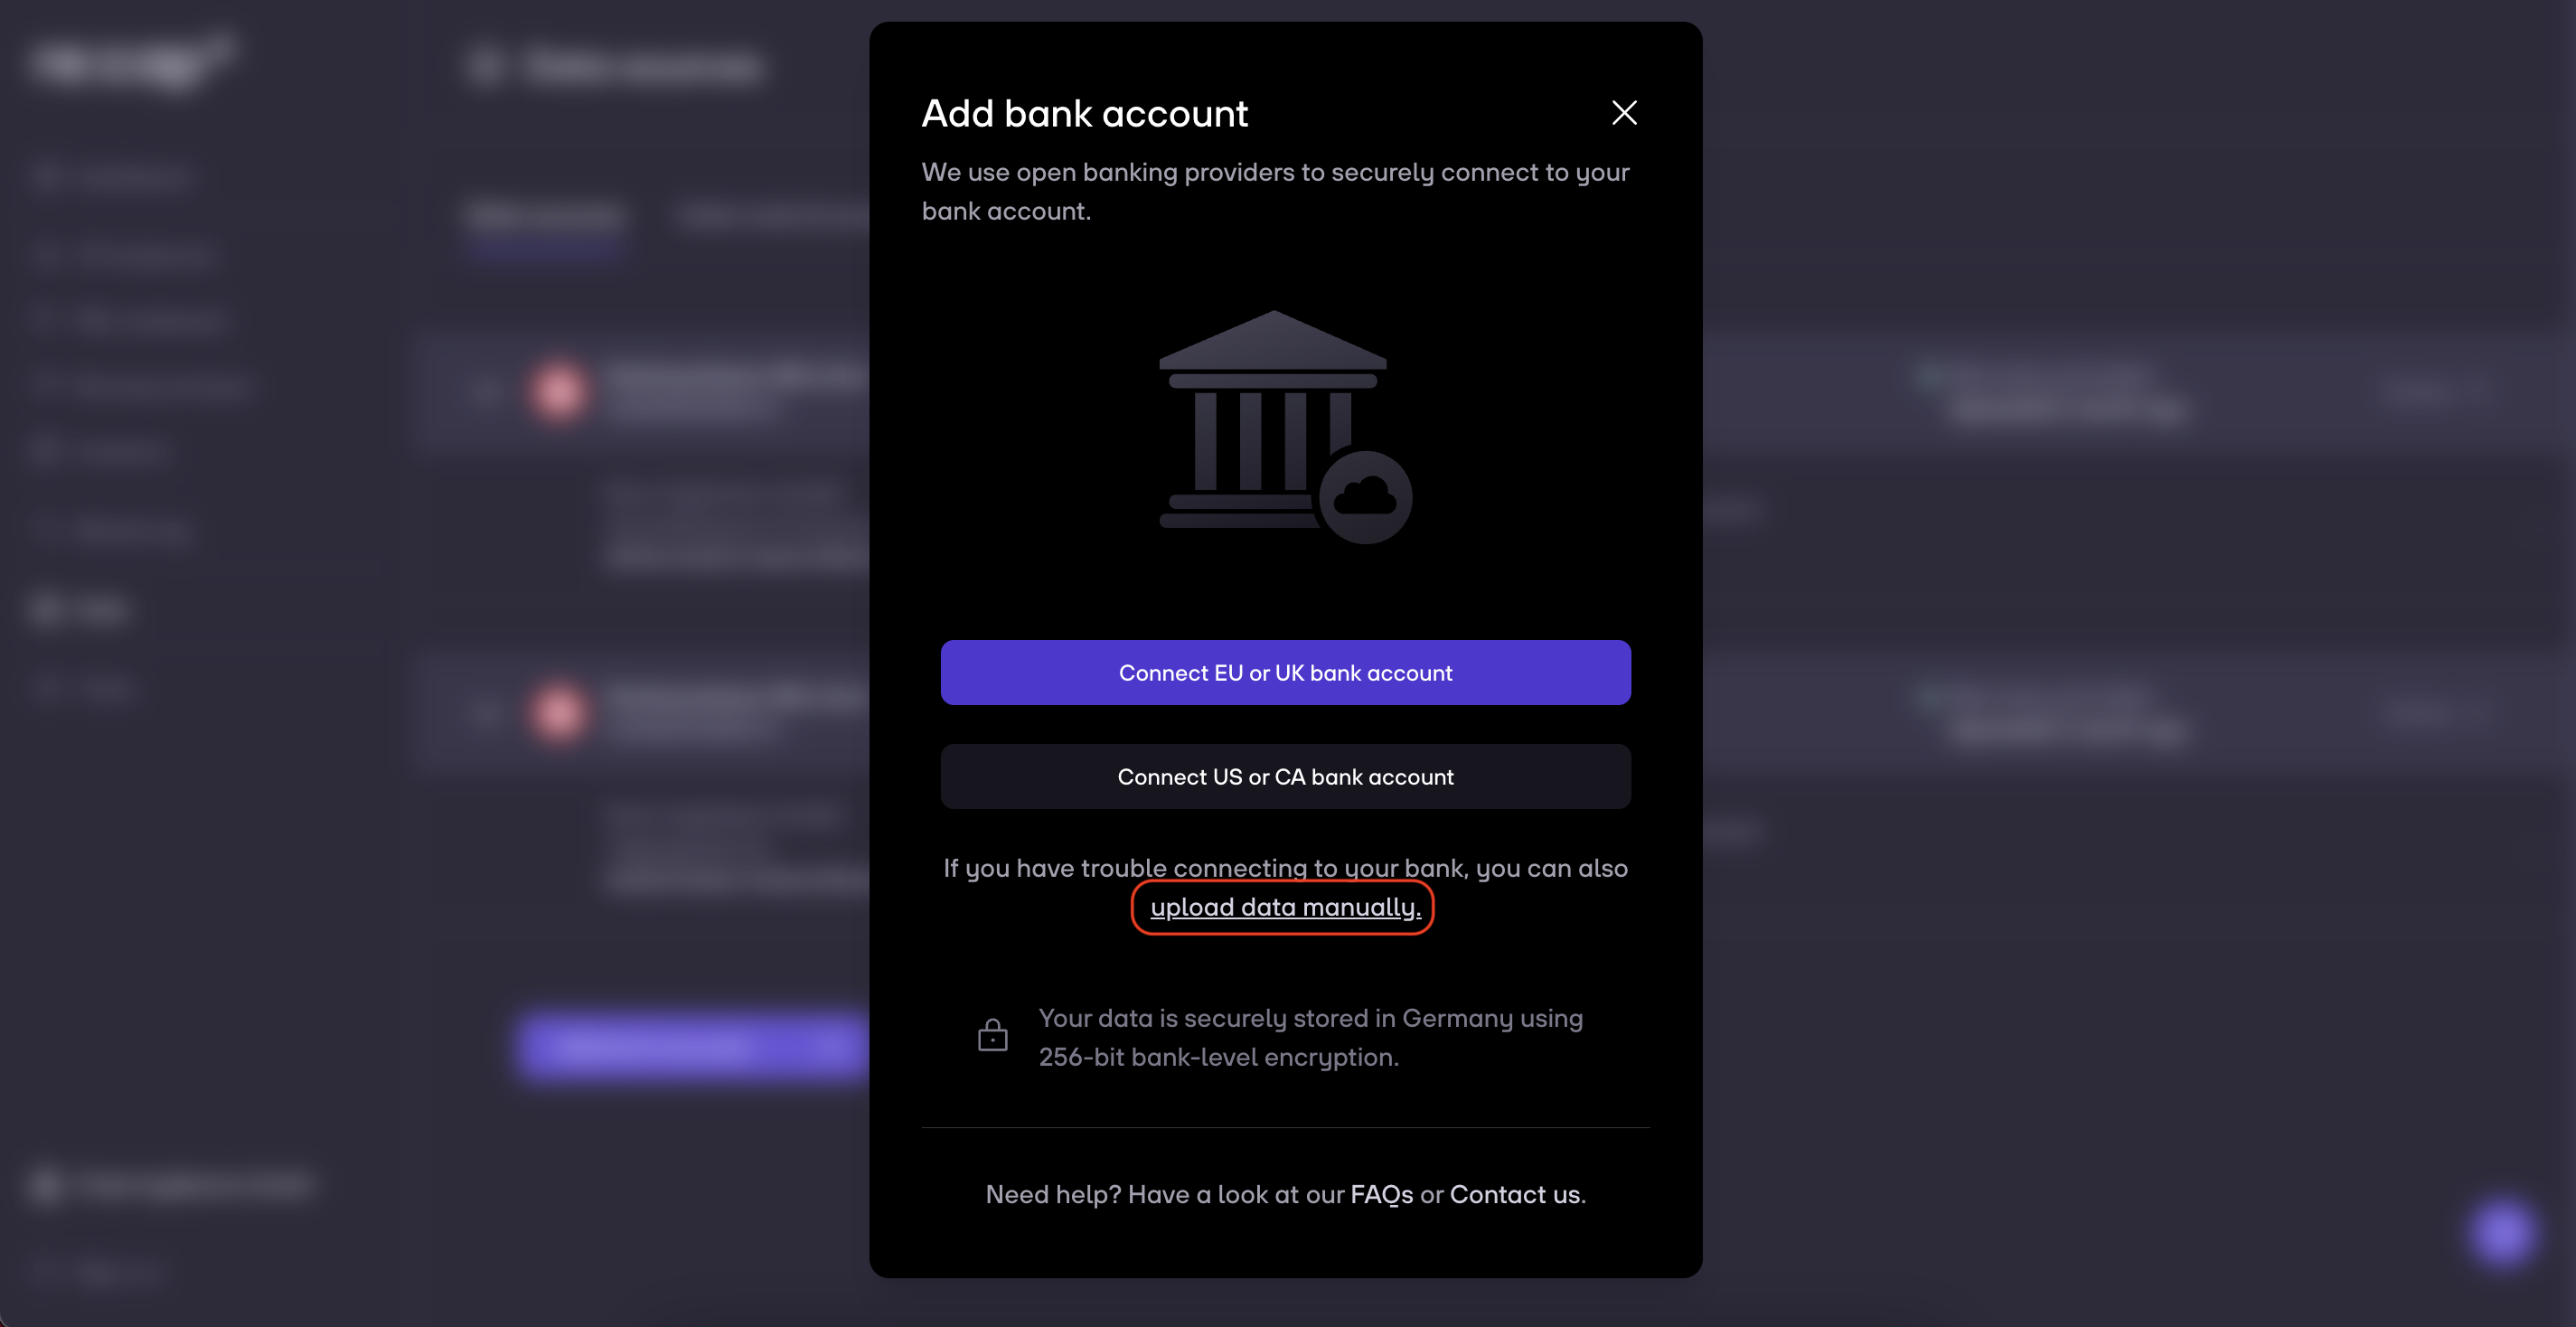
2. Click on Upload data manually.
3. Enter the current account balance and the other account information and then click on Upload transactions next.

4. Select the bank statement you have just downloaded from your bank account by clicking on Browse file.

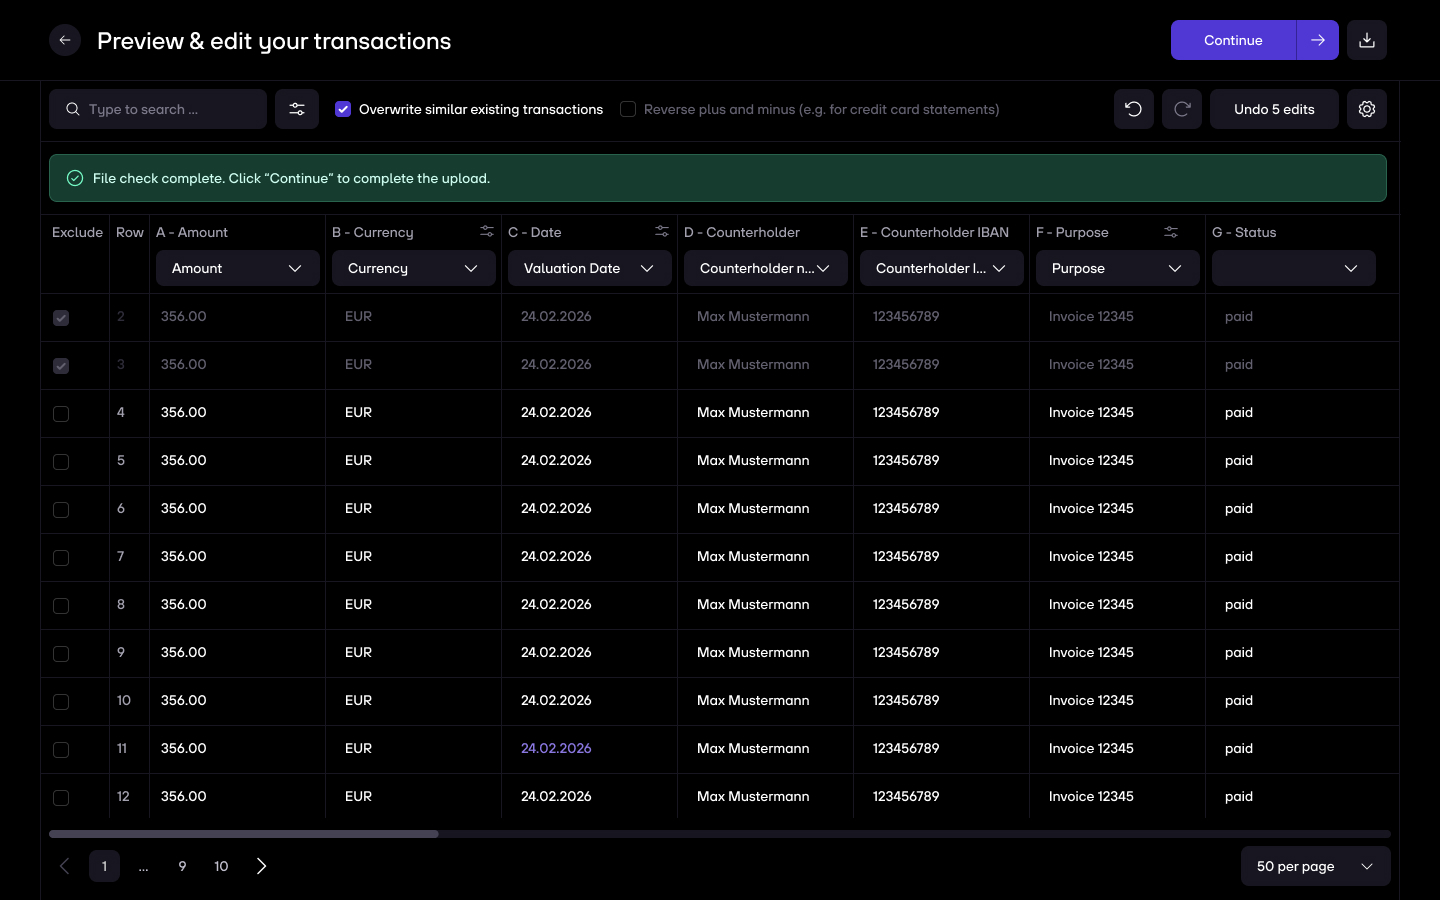
5. You will get a preview of your uploaded transactions. You have the options to:
- Overwrite similar existing transactions (useful when you want to correct a previous upload which contained mistakes, or want to avoid accidental transaction duplicates). Enabled on default.
- Reverse plus and minus signs (especially useful for credit card statements, which are usually the wrong way around)
6. The columns will be detected automatically. If there is a missing column, you can add it manually.
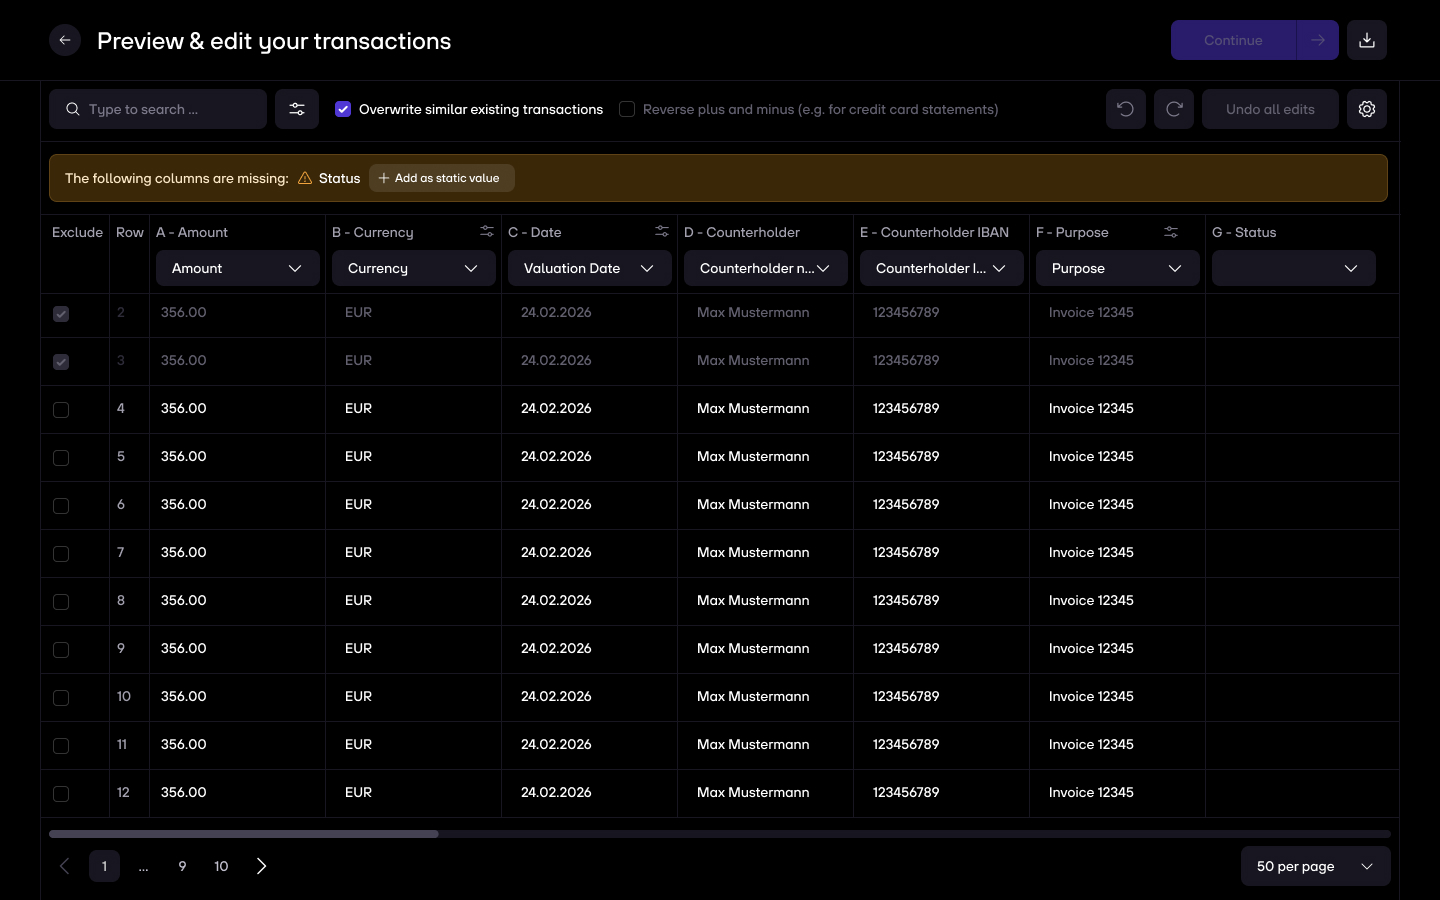
7. You can fix issues by directly clicking & editing inside of a cell.

8. If the status bar turns green or gray, you can finish the upload.
9. Lastly, you will see a preview of your uploaded transactions and bank details.

10. We will then start processing your transactions. You can close the modal while your transactions are being imported. This will take a couple of minutes.

11. Once everything is imported, you can see your manually added bank under Data > Bank accounts > Data sources.

Manually upload a single transaction
It is also possible to uploading single transactions to your account, for e.g. in these cases:
- You have secured liquidity, but are still waiting for the money to appear in your account
- You cannot access your bank statement
1. Click on Data > Bank accounts in the navigation menu and then on Add bank account at the bottom of the screen. Then select Single transactions at the top of the modal.

2. Input the required data:
- Counter IBAN: If you don’t have an IBAN, use an account identifier (A random set of characters in one string works)
- Counter name: Enter the originator, e.g. the investor’s name
- Date: If the expected date is in the future, use today’s date to make the amount appear in the insights already
- Purpose: Should be something describing the transaction or liquidity adjustment
- Amount: The total amount of the transaction that you want to add to the account
- Currency: Choose the right option from the dropdown
3. Tap on Continue once done. The transaction will now be visible in your list of transactions under Analysis > Cash positioning > Transactions.


