
Adding transactions manually to a bank account
1. Click on Add transactions behind the bank account name.
2. Insert the updated account balance.

3. You will then see a preview of the latest transactions.

4. Go to your bank, and download an account statement including all new transactions that happened since.
5. Upload the statement.
6. Select the bank statement you have just downloaded from your bank account by clicking on Browse file.

7. You will get a preview of your uploaded transactions. You have the options to:
- Overwrite similar existing transactions (useful when you want to correct a previous upload which contained mistakes, or want to avoid accidental transaction duplicates). Enabled on default.
- Reverse plus and minus signs (especially useful for credit card statements, which are usually the wrong way around)

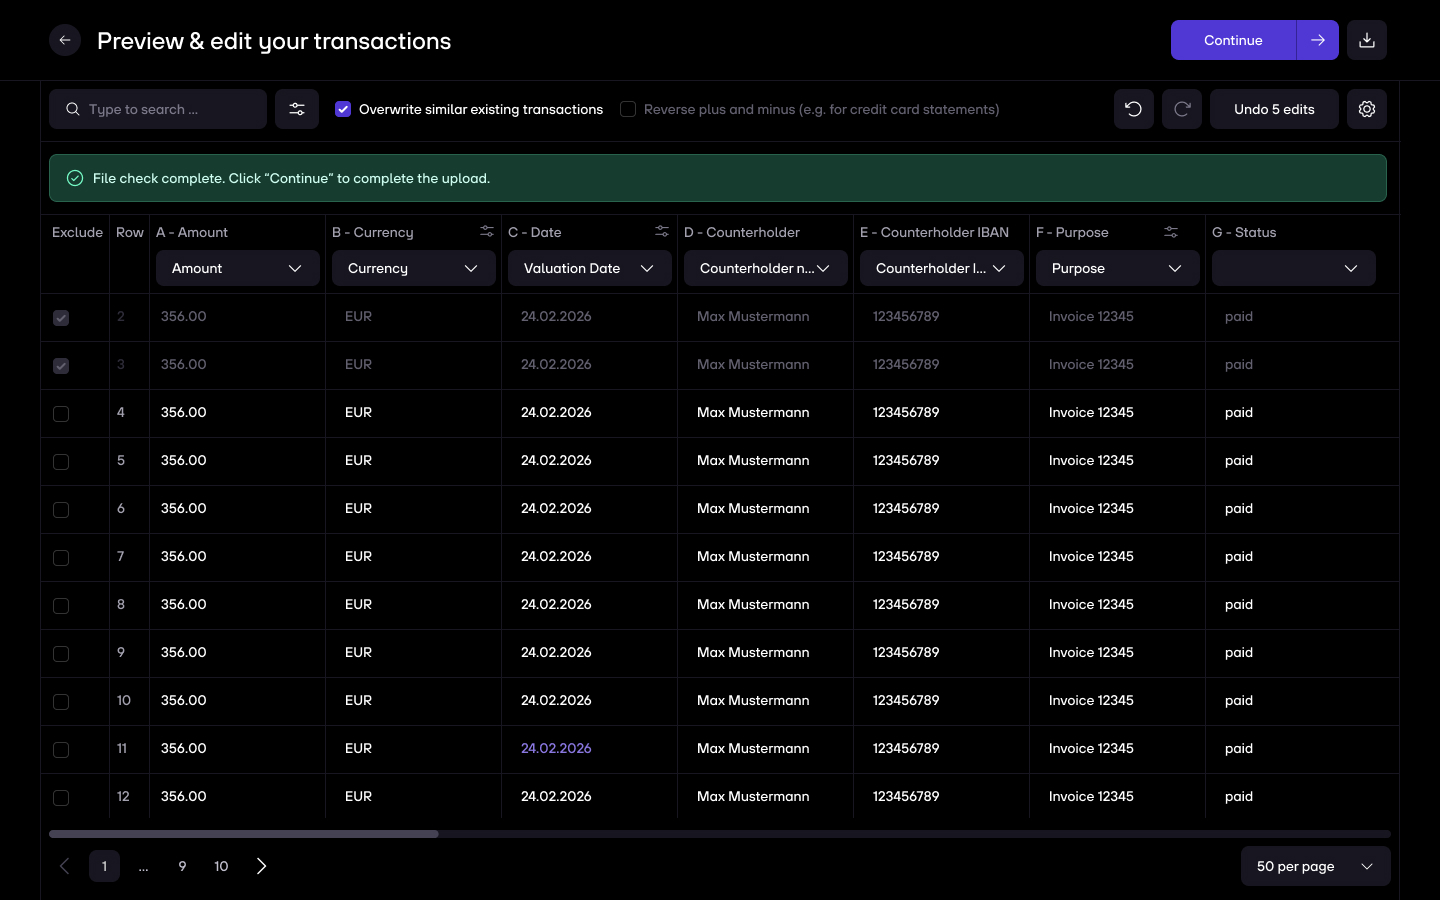
8. The columns will be detected automatically. If there is a missing column, you can add it manually.
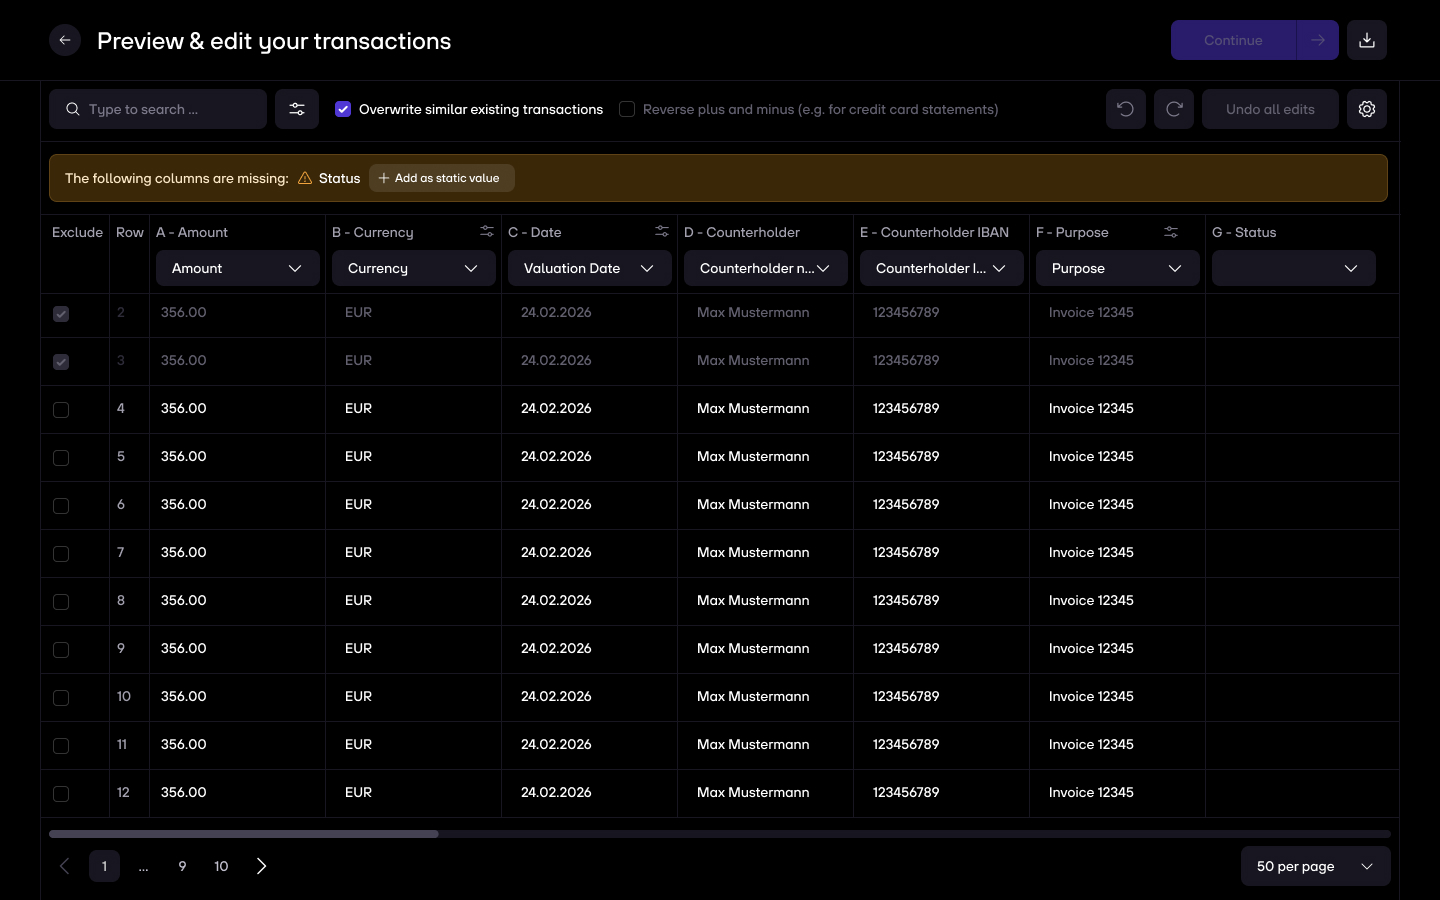
9. You can fix issues by directly clicking & editing inside of a cell.

10. If the status bar turns green or gray, you can finish the upload.
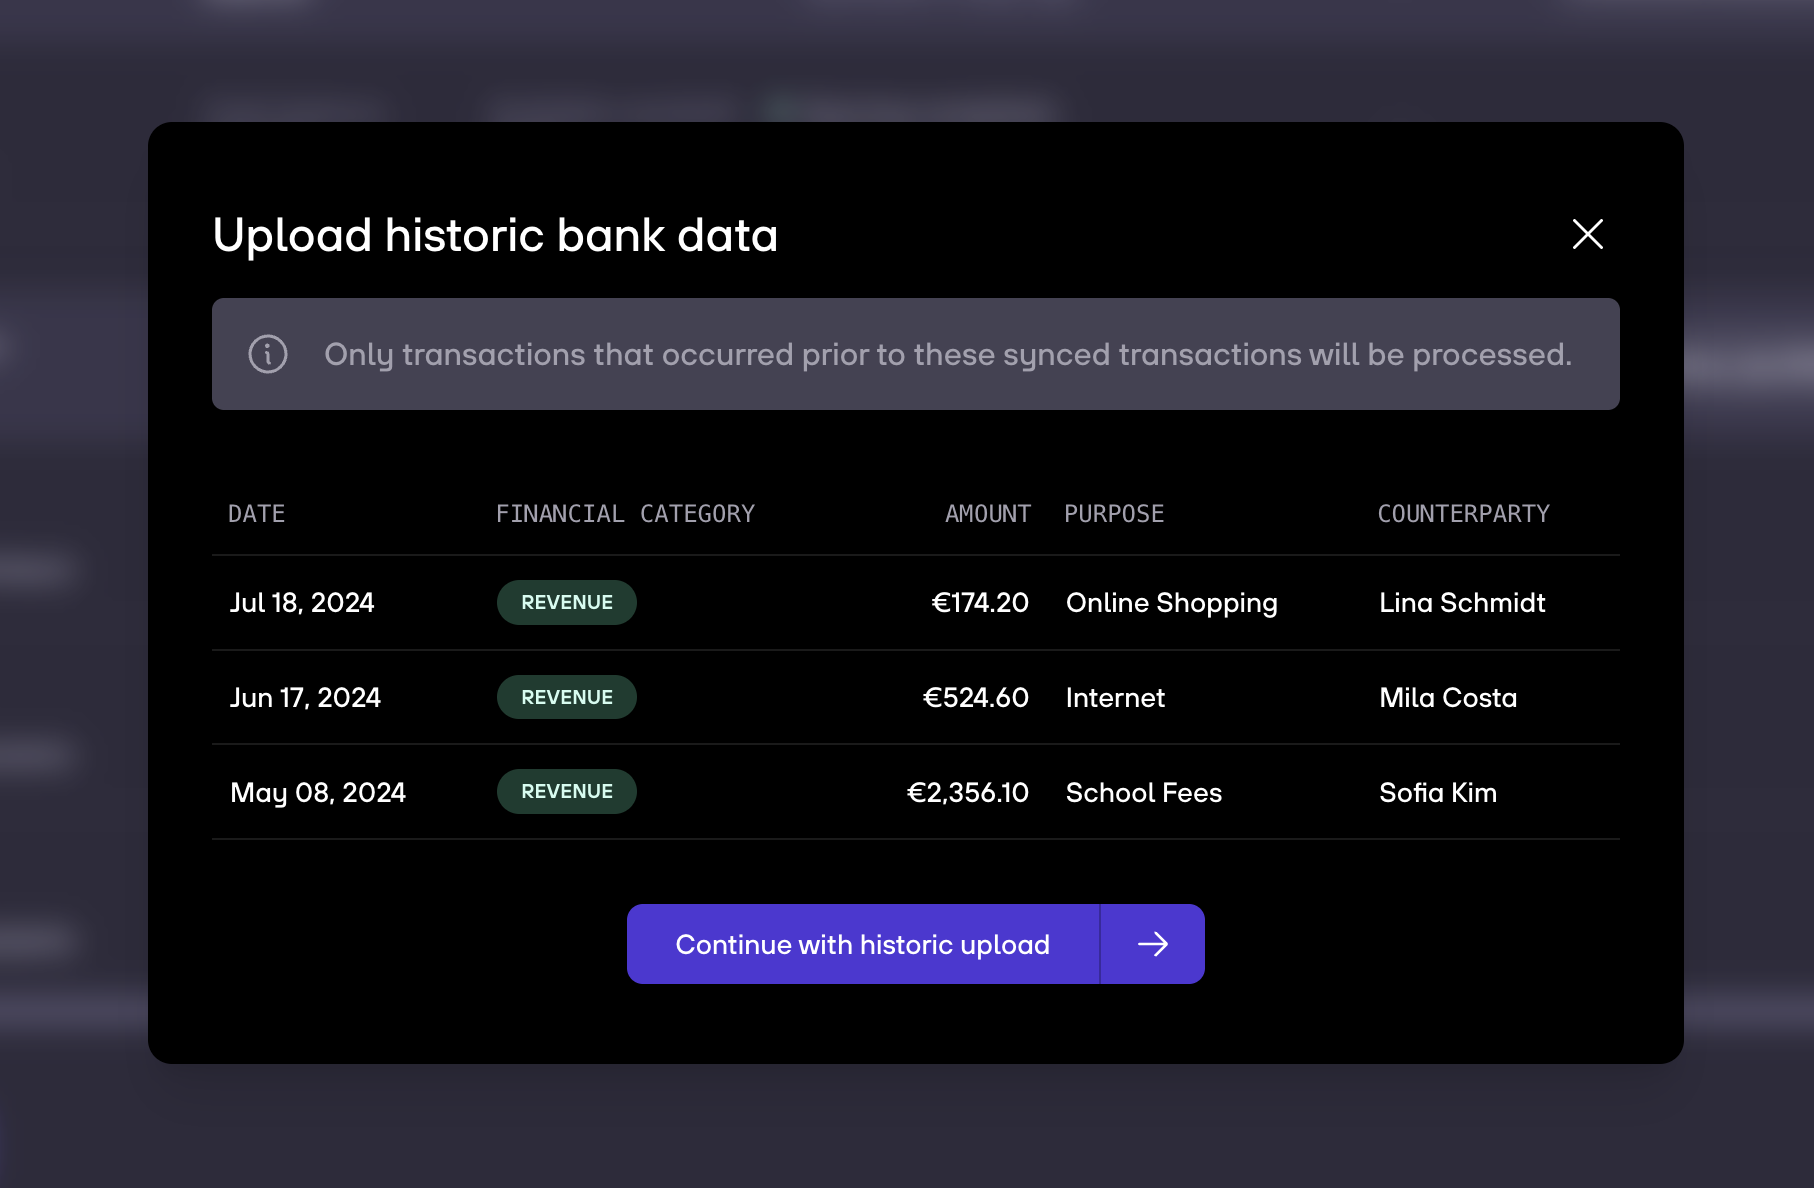
11. Lastly, you will see a preview of your uploaded transactions and bank details.

12. We will then start processing your transactions. You can close the modal while your transactions are being imported. This will take a couple of minutes.

13. Once everything is imported, you can see your manually added bank under Data > Bank accounts > Data sources.

Marking a bank account as up to date
1. If there weren’t any new transactions in the last weeks, you can click on Mark as up to date behind the bank name.

2. Confirm that there are no new transactions and upload a proof.

3. The account is now shown as up to date.

Adding transactions to a bank connection
re:cap works with open banking providers, which usually enables 180-365 days of transactions history. If you want to extend that history, you can manually add transactions that happened before.
1. Click on Add transaction history behind the bank account name.
2. You will then see the earliest transactions that are already on the re:cap platform for that account.
3. Go to your bank, and download an account statement including the transactions you want to add, and which happened before.
4. Upload the statement.
5. Select the bank statement you have just downloaded from your bank account by clicking on Browse file.
6. You will get a preview of your uploaded transactions. You have the options to:
- Overwrite similar existing transactions (useful when you want to correct a previous upload which contained mistakes, or want to avoid accidental transaction duplicates). Enabled on default.
- Reverse plus and minus signs (especially useful for credit card statements, which are usually the wrong way around)
7. The columns will be detected automatically. If there is a missing column, you can add it manually.
8. You can fix issues by directly clicking & editing inside of a cell.
9. If the status bar turns green or gray, you can finish the upload.
10. Lastly, you will see a preview of your uploaded transactions and bank details.
11. We will then start processing your transactions. You can close the modal while your transactions are being imported. This will take a couple of minutes.
12. Once everything is imported, you can see your manually added bank under Data > Bank accounts > Data sources.


